A beautiful manicure may look effortless, but behind every clean French tip, glossy gel overlay, tiny flower, or chrome accent is a set of tools doing quiet, precise work. Whether you are learning at home or upgrading a salon station, the best nail design tools are the ones that help you prep safely, apply product smoothly, and create art with control. The good news is that beginners do not need a drawer full of gadgets to start, while professionals can build a refined toolkit that saves time and expands creative possibilities.
TLDR: Beginners should start with essential nail prep tools, a good file and buffer, dotting tools, a few detail brushes, a cleanup brush, and a reliable base and top coat. Professionals benefit from higher-quality brushes, an electric file, advanced gel systems, a dust collector, stamping kits, chrome powders, and organized sanitation supplies. The best toolkit is not necessarily the biggest one; it is the one that supports clean prep, safe application, and consistent results. Invest gradually, choose quality where precision matters, and keep everything clean and well maintained.
Why the Right Nail Tools Matter
Nail design is part beauty, part craftsmanship. Polish color certainly matters, but the final result depends heavily on preparation, product control, and finishing. A shaky brush, dull file, weak lamp, or messy cuticle area can make even the prettiest design look unfinished. On the other hand, a few well-chosen tools can make simple designs look professional.
For beginners, the right tools reduce frustration. They make it easier to paint close to the cuticle, create dots and lines, remove mistakes, and achieve a smooth surface. For professionals, tools are about speed, consistency, hygiene, and creative range. A salon-quality kit must withstand daily use and meet higher standards for sanitation and performance.
Essential Nail Prep Tools
Great nail art begins before the first drop of polish touches the nail. Prep tools create the clean, even foundation needed for long-lasting designs.
- Nail clippers: Useful for shortening natural nails before shaping. Choose sharp stainless steel clippers for a clean cut.
- Nail files: A must-have for shaping. Beginners can start with 180 or 240 grit files, while professionals often keep multiple grits for natural nails, enhancements, and refining edges.
- Buffer blocks: These smooth ridges and lightly remove shine before gel application. Avoid over-buffing, which can weaken the nail plate.
- Cuticle pusher: A metal or wooden pusher helps gently move back cuticles and clear the nail surface.
- Cuticle nippers: Best used carefully and only for loose hangnails or dead skin. Professionals may rely on them more often, but beginners should be cautious.
- Nail cleanser or alcohol wipes: Removes oils and dust so polish or gel adheres better.
For beginners, a simple kit with a file, buffer, wooden cuticle sticks, and alcohol wipes is enough to begin. Professionals should invest in durable stainless steel implements that can be properly disinfected between clients.
Brushes Every Nail Artist Should Know
Brushes are where nail design becomes artistic. Different brush shapes allow you to paint lines, petals, swirls, gradients, and miniature details.
- Detail brush: Perfect for tiny flowers, stars, hearts, and fine outlines. It is one of the best beginner-friendly nail art tools.
- Liner brush: Long and thin, ideal for straight lines, swirls, plaid patterns, and abstract designs.
- Flat brush: Useful for one-stroke flowers, color blocking, and cleaning edges when dipped in remover.
- Ombre brush: Designed to blend two or more colors softly across the nail.
- Cleanup brush: A small angled or flat brush used with acetone to remove polish from skin and perfect the cuticle line.
If you are just starting, buy a small set that includes a detail brush, liner brush, and cleanup brush. Professional nail artists should look for brushes with fine synthetic bristles, secure ferrules, and caps to protect the tips. A damaged brush can turn a beautiful design into a blurry mess, so cleaning and storage are just as important as the brush itself.
Dotting Tools: Small Tool, Big Impact
Dotting tools are among the easiest and most satisfying nail design tools to use. They usually come with rounded metal tips in different sizes. With them, you can create polka dots, flowers, animal prints, cherries, bubbles, eyes, and lace-like patterns.
For beginners, dotting tools are excellent because they do not require advanced brush control. Dip the tip into polish or gel, place it on the nail, and repeat. Professionals use dotting tools for fast accents, symmetrical details, and mixed-media designs. A five-piece set with different tip sizes is inexpensive and useful at every skill level.
Striping Tape, Stickers, and Decals
Not every design has to be hand-painted. Nail stickers, decals, and striping tape help beginners achieve salon-like results quickly. They are also valuable for professionals when time is limited or when clients request highly detailed patterns.
- Striping tape: Creates crisp geometric lines, metallic accents, and negative-space designs.
- Water decals: Thin printed designs that slide onto the nail after soaking in water.
- Adhesive stickers: Easy to apply and great for stars, butterflies, lettering, and seasonal art.
- Nail vinyls: Used as stencils for shapes such as chevrons, moons, flames, and French tips.
The key to using decals successfully is sealing them well. Apply them over a dry or cured base, smooth the edges, and finish with a generous layer of top coat. For gel users, a strong no-wipe top coat can help lock designs in place.
Stamping Kits for Fast, Detailed Art
Nail stamping is a game changer for anyone who loves detailed patterns but does not want to paint every tiny line by hand. A stamping kit usually includes engraved plates, a scraper, and a silicone stamper. You apply stamping polish to the plate, scrape away the excess, pick up the design with the stamper, and press it onto the nail.
Beginners may need a little practice, but stamping can quickly produce impressive results such as lace, florals, snakeskin, snowflakes, and abstract textures. Professionals often use stamping because it provides consistent detail for multiple clients and can be layered with hand-painted elements for a custom look.
UV and LED Lamps for Gel Nails
If you plan to work with gel polish, a curing lamp is essential. Gel products do not air-dry like regular polish; they need a UV or LED lamp to harden properly. Beginners should choose a reliable lamp with enough wattage, a timer, and enough space for the whole hand. Professionals need lamps that cure consistently, work with their chosen gel systems, and can handle frequent use throughout the day.
One common mistake is assuming all lamps cure all gels the same way. Different gel products may require specific curing times or wavelengths. Always follow the manufacturer’s instructions. Under-cured gel can lead to lifting, dullness, or skin sensitivity, while overexposure and improper application can also cause problems. Safety and correct technique matter just as much as shine.
Electric Nail Files for Advanced Work
An electric nail file, often called an e-file, is not necessary for every beginner, but it becomes very useful for advanced manicures, gel overlays, acrylic enhancements, and professional services. An e-file can remove bulk, refine product, clean underneath extensions, and speed up removal.
For beginners, it is best to learn hand filing first before using an e-file. Improper pressure or the wrong bit can damage natural nails. Professionals should invest in a quality machine with adjustable speed, low vibration, and compatible bits. Common bits include sanding bands, mandrel bits, safety bits, flame bits, and carbide removal bits. Training is strongly recommended before using an e-file on clients.
Tools for Gel, Acrylic, and Dip Powder Designs
As skills grow, many nail artists move beyond regular polish into structured gel, builder gel, acrylic, or dip powder. These systems require additional tools.
- Gel brushes: Used for builder gel, painting gel, and thicker art gels.
- Acrylic brush: Usually made with natural hair or high-quality synthetic fibers, designed to hold liquid monomer and shape acrylic beads.
- Dappen dish: A small glass dish for holding monomer during acrylic application.
- Dip powder trays: Help pour powder neatly over the nail and reduce contamination.
- Nail forms and tips: Used to create length and structure for extensions.
These tools are more technical and often require practice. Beginners can experiment with press-on tips, soft gel tips, or beginner-friendly builder gels before moving into full acrylic systems. Professionals should choose products from compatible systems and avoid mixing brands randomly unless they fully understand how the chemistry works.
Decorative Tools and Trend Accessories
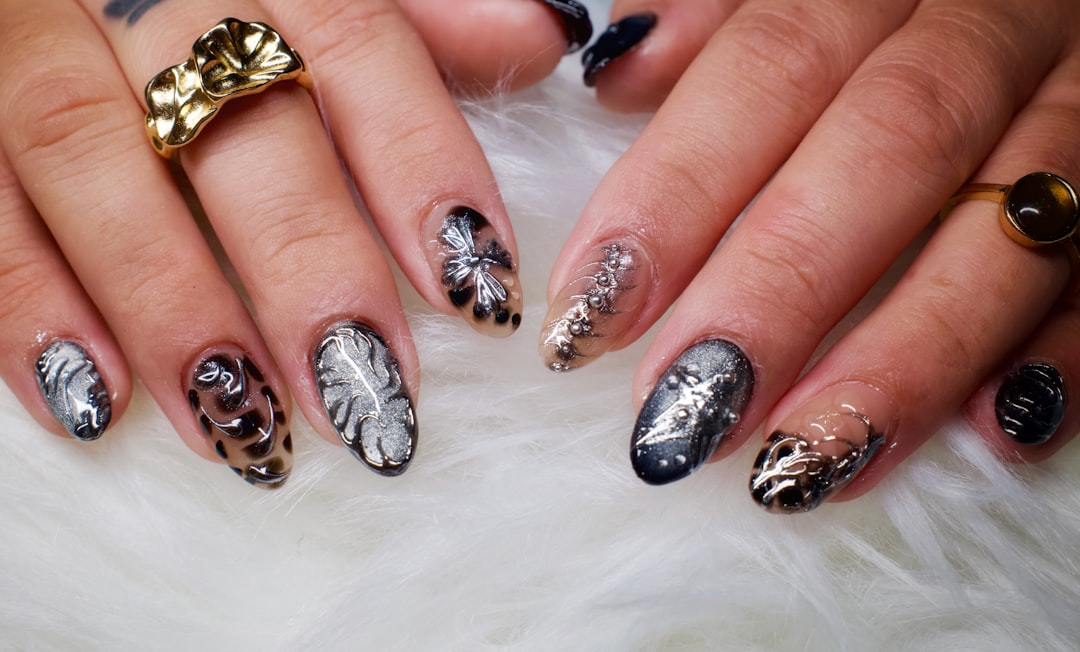
Once the basics are covered, decorative tools open the door to more exciting designs. Rhinestones, chrome powders, magnetic cat-eye gels, foils, glitter, dried flowers, and metallic flakes can make even a simple manicure look luxurious.
- Rhinestone picker: A wax-tipped or silicone tool that makes placing gems much easier.
- Chrome applicator: Often a sponge tip or silicone tool used to rub chrome powder onto cured gel.
- Foil glue: Helps transfer foil patterns onto the nail.
- Magnet wand: Used with magnetic gel polish to create cat-eye and velvet effects.
- Palette and mixing spatula: Useful for blending custom colors, gels, and pigments.
For beginners, start with glitter, stickers, and a rhinestone picker. Professionals can build a wider collection of textures and finishes to offer seasonal and trend-based designs. The most eye-catching nail art often combines one bold element with clean application rather than using every decoration at once.
Sanitation and Safety Tools
Sanitation is not glamorous, but it is one of the most important parts of nail care. Clean tools protect both the nail artist and the client. Even at home, using dirty tools can spread bacteria or cause irritation.
- Disinfectant solution: Essential for reusable metal tools in professional settings.
- Disposable files and buffers: Hygienic for client services and convenient for beginners.
- Dust brush: Removes filing dust from nails and hands.
- Dust collector: Useful for professionals who file gel, acrylic, or dip powder regularly.
- Gloves and masks: Help reduce exposure to dust and chemicals during long work sessions.
Professionals should follow local regulations for disinfection, storage, and single-use items. Beginners should still wipe tools after use, avoid sharing personal implements, and replace worn files regularly.
Storage and Organization
A well-organized nail kit saves time and keeps tools in better condition. Brushes should be stored with caps or upright away from dust. Polishes and gels should be kept away from direct sunlight and extreme heat. Small accessories such as rhinestones, foils, and decals are easiest to manage in labeled containers.
Beginners can use a simple cosmetic case, drawer organizer, or rolling pouch. Professionals may prefer a salon trolley, labeled gel racks, brush cases, and separate containers for clean and used tools. Organization is not just about appearance; it helps prevent contamination, product waste, and lost supplies.
Best Starter Toolkit for Beginners
If you are new to nail design, you do not need to buy everything at once. A practical beginner kit might include:
- Nail clippers, files, and a buffer block
- Wooden cuticle sticks or a gentle cuticle pusher
- Base coat, top coat, and a few favorite polish colors
- A cleanup brush and acetone
- Dotting tools
- A thin liner brush and detail brush
- Stickers, decals, or striping tape
- Cuticle oil for finishing
This setup allows you to practice clean polish application, simple art, dots, lines, florals, and accent nails without becoming overwhelmed.
Best Professional Toolkit Upgrades
For professionals, the best tools are durable, efficient, and suited to frequent use. Consider upgrading to:
- A high-quality e-file with professional bits
- A strong, compatible LED lamp
- Premium detail, liner, gel, and acrylic brushes
- A dust collector for filing services
- Professional sanitation supplies
- Stamping plates and specialty art gels
- Organized storage for colors and accessories
- Ergonomic lighting and a comfortable workstation
These upgrades help improve service quality, reduce appointment time, and support more advanced designs.
Final Thoughts
The best nail design tools for beginners and professionals are not always the most expensive or the trendiest. They are the tools that help you create clean, safe, long-lasting, and beautiful nails. Beginners should focus on mastering prep, polish control, and simple art tools before expanding. Professionals should invest in precision, sanitation, durability, and systems that support their workflow.
Ultimately, nail design is a skill built through practice. A dotting tool can become a flower maker, a liner brush can create elegant swirls, and a simple cleanup brush can make the difference between amateur and polished. With the right tools in hand, every manicure becomes a small canvas waiting for creativity.