WooCommerce Table Rate Shipping is a premium plugin that offers you many possibilities. It is a simple, highly flexible, and user-friendly plugin that allows you to completely change the way you do your shipping in the best way possible.
This article will just be scratching the surface of the tool’s features, including shipping by weight, number of items in the cart, etc. There is also the option to create a more complex, completely customized set of rules that you can apply to your shipping.
Moreover, this article will only focus on using the tool to charge your WooCommerce shipping by item.
How to Set Up WooCommerce Shipping by Item
The goal is setting up your shipping by item count, which is sometimes also known as shipping by the number of items in the cart. You get to your WooCommerce store settings, and under shipping, you set up your desired zone.
Add a Shipping Zone
That’s the first step, and if you are not well-acquainted with shipping zones and the way they work, feel free to check out the WooCommerce website and knowledge database. There you can get simple descriptions along with illustrations and examples.
Furthermore, it would be pretty convenient to make sure you ultimately get the hang of shipping zones because they can be impressively convenient once you do.
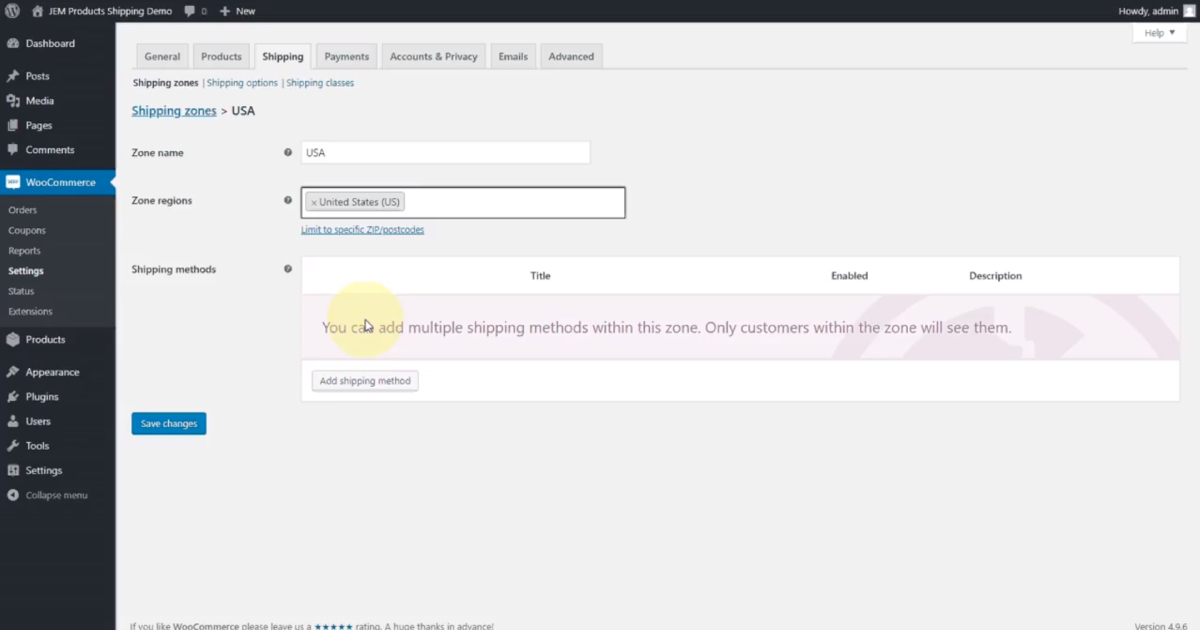
So, if you look at the Zone Region, you can see that it offers various countries you can pick. Let’s say we fill this spot with the “United States.” That means that the rules will apply to any orders from this same zone. So, any orders from the US will follow the rules implemented.
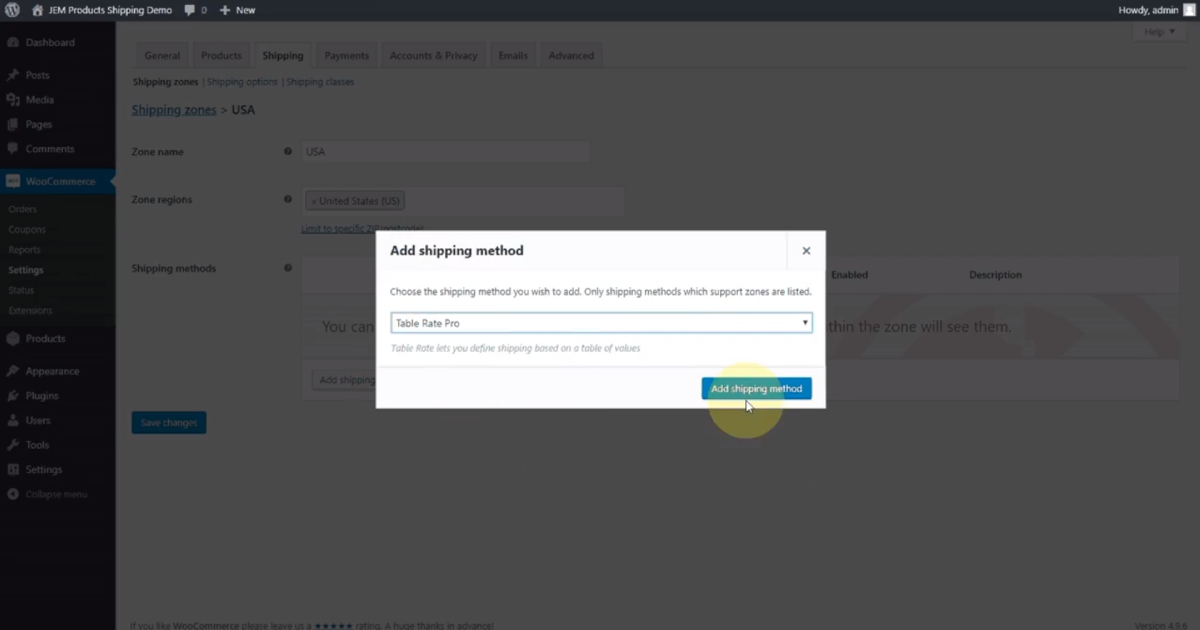
Add a Shipping Method
The next step is to add a shipping method. Pick Table Rate Pro and add it in. You don’t have to worry about your choice disappearing, as WooCommerce saves it automatically. After you’ve completed that, now it’s time to set up the rules.
Adding the method is the first one up. Enable it by ticking the “Enable this shipping” box under the Enable/Disable row. Let’s say we call the first method “Standard.” This title is just for you to know what you are dealing with, and it won’t appear in the customer’s cart or checkout page.
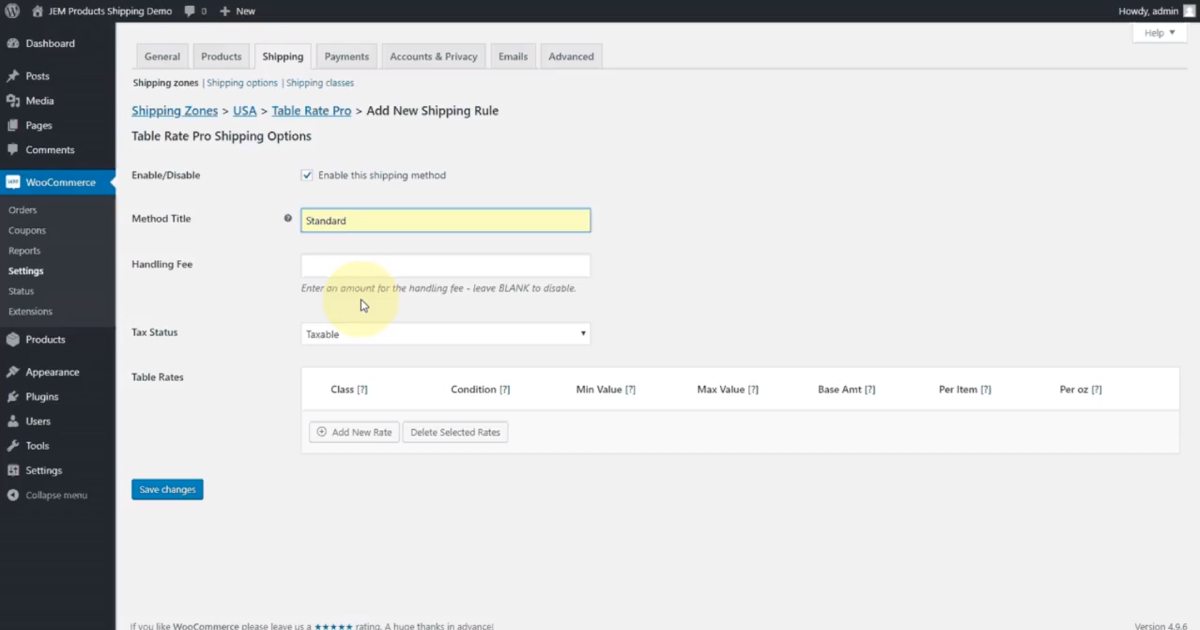
So you can set it to whatever makes sense for your business, whether it is Standard, Express, Overnight, Local Pickup, and so on.
Then there’s the optional part of adding a handling fee. A handling fee is an amount added to orders, and you can leave it blank if you don’t want to add anything. After that, there is the choice of the shipping being either taxable or non-taxable.
Setting Up the Shipping Rules
Next up are the essential rules, and there are quite a few options for you to choose from. You have to pick if you want this rule to be applied based on the shipping class. Once again, if you are not acquainted with shipping classes, have a glance at the WooCommerce article that explains everything you need to know.
In this instance, we will reject this option and choose not to apply it to items that do not have a class set.
After this, we can decide how to apply this rule. Let’s say we use it by the number of items. We are letting the plugin know you want to set up the shipping depending on how many items are in the cart.
In this case, we will apply this to carts with several items anywhere between zero and infinity, represented by the asterisk sign. That means it will cover any situation, whether you have got a single item, 69 items, or even 5 million items in the cart.
Following that, you put how much you want to charge the shipping. For example, you can set it to $3 per order and $1 per item in the cart. So, if the customer has one item in the cart, their charge will be $3 plus the $1 per item, leading to a total of $4. Correspondingly, if they have two items in the cart, that’s $3 plus $2.
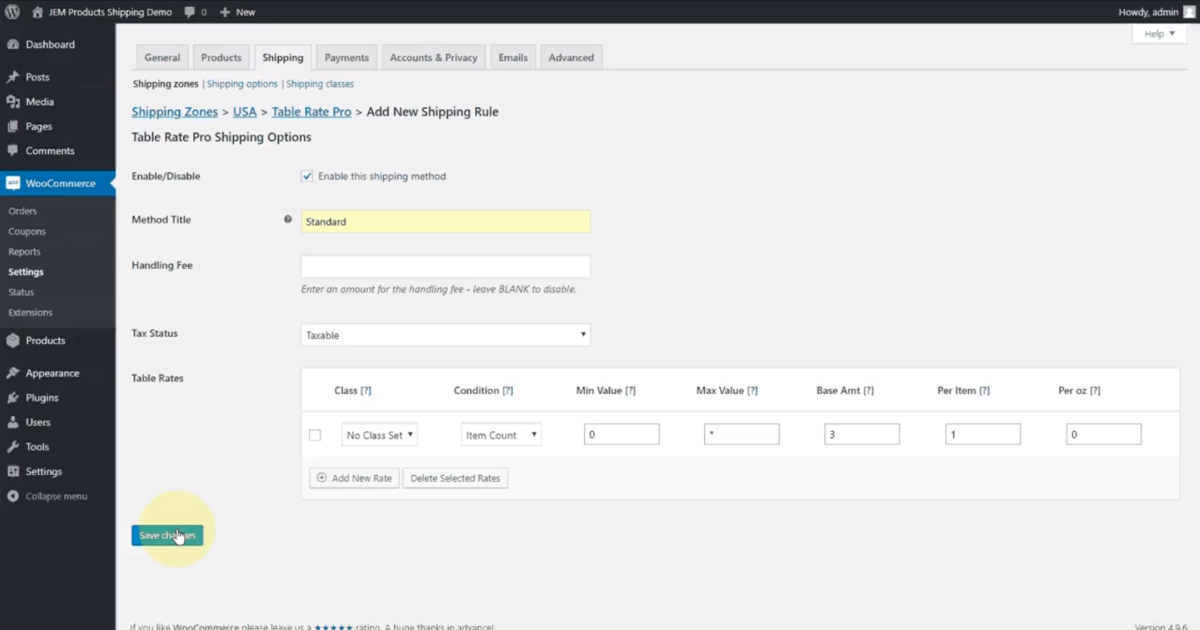
This system of shipment charging is quite simple and very common. Save those changes you made, and that’s it!
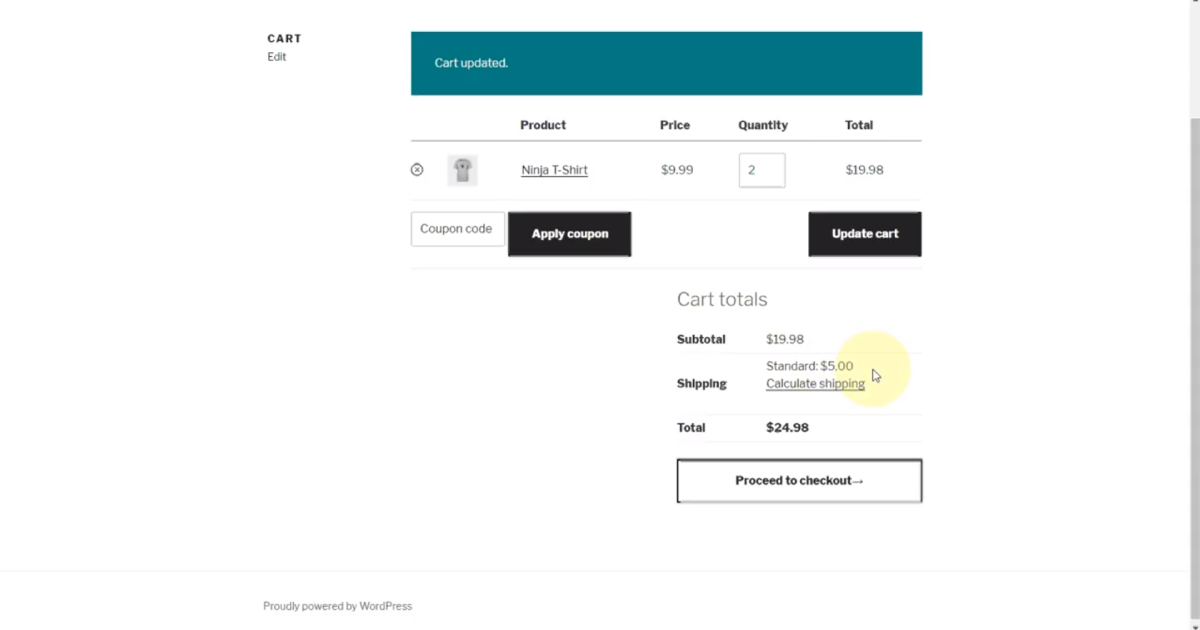
Test the Plugin
Now you can check out your site’s cart to see the plugin in action. Set the number of items to two and see how the rate changes. That’s $5, so $3 of the base amount plus $1 per item. This practice should give you a satisfying demonstration of the plugin’s versatility at work.
And remember, this is merely the tip of the iceberg of all the features the tool can offer you.
Conclusion
With WooCommerce Table Rate Shipping, setting up your shipping by item is only the beginning. You don’t have to be an expert in using it.
It is a nifty plugin that offers various features, such as a plan for your shipping rates and the option to add handling fees to either individual or group orders, and complete supervision of shipping amounts. For even more robust workflow and order management, integrating a platform like eWorkOrders can help ensure your entire process runs smoothly from start to finish.
There’s also the option to set a shipping rate depending on the product’s weight, the number of items, the countries, states, zip codes, etc.
This article explained how to charge your WooCommerce shipping by item. Even so, remember that if you have more questions or you need an explanation of some other features, feel free to check out the WooCommerce website and browse through their helpful database.
Also, if you search for a little something that will help you with selling online products, you can check out another plugin called WooCommerce’s Order Export, which also saves you a lot of time and nerves.