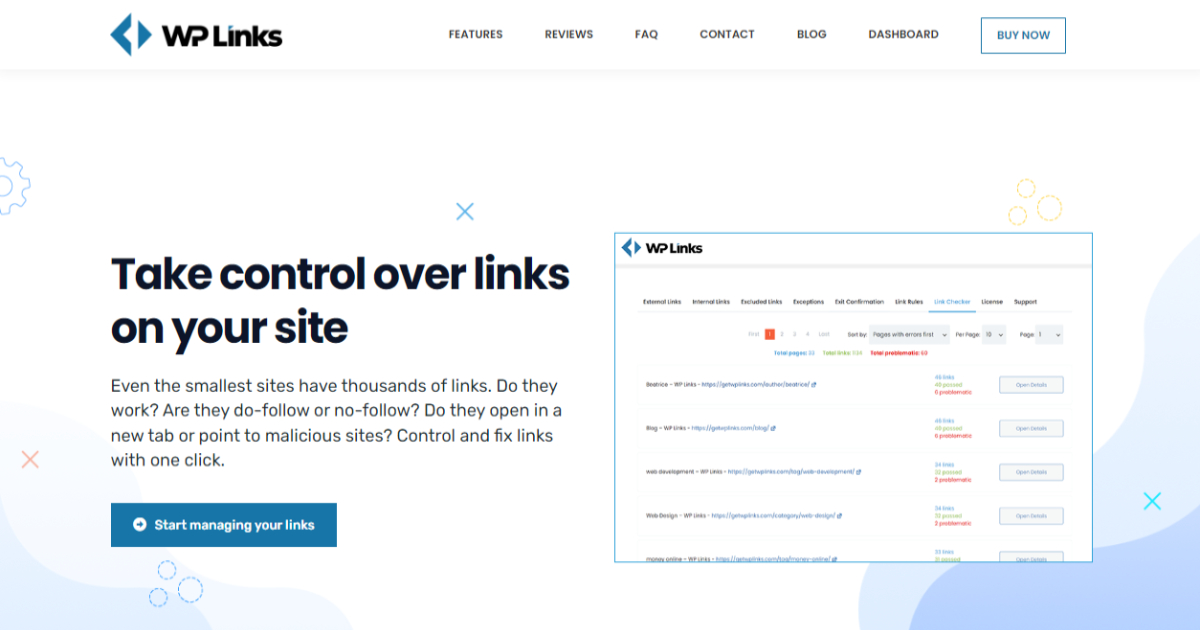
If you’re looking for a great way to take control of the links on your website, you’ve come to the right place. Today, we’ll talk a little about our new WordPress plugin, WP Links, which allows you to customize how your links behave—external or internal.
But first, what are external and internal links, exactly? Internal links on your website lead to different locations within the same website, whereas external links frequently take us to other third-party websites. As a website owner, your primary focus should be on defining clear rules by which these links will abide.
However, it’s almost impossible to modify each link manually. There are thousands of links on an average website, and WP Links provides various ways for you to cover all of them in a matter of minutes.
Let’s look at some of the features this plugin offers and see just how simple and quick it is to use!
External Links
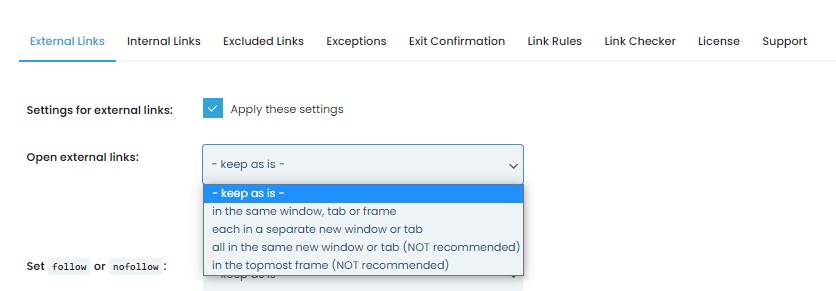
The “External Links” tab will appear when launching the plugin. Here, you can set which rules you want specific external links to follow when clicked on. Remember that these rules will apply to all external links on your website, as you will later have the option to exclude specific links.
How to Manage External Links
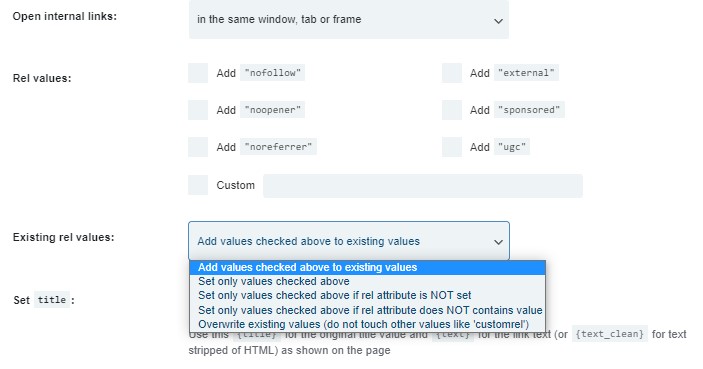
You have four options to choose from, but the plugin recommends only using the first two because the other two are way less efficient and can lead to frustration among users. The first option is where you want the external links to open.
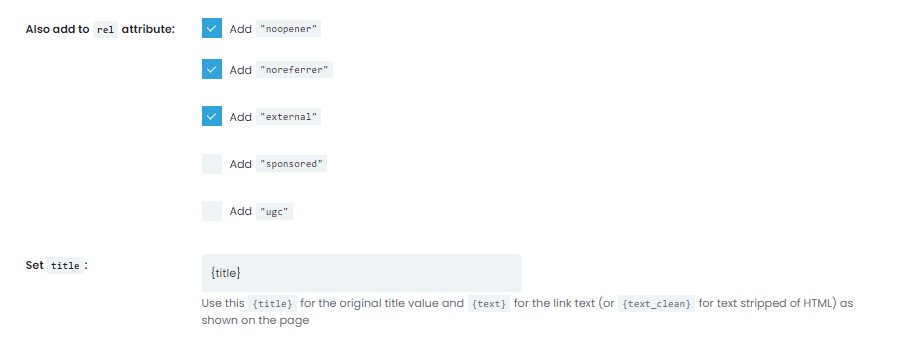
Following that, you must specify whether your links should be “follow” or “nofollow.” This is a vital step if you want your website to rank higher in the Google rankings.
Gone are the days when website owners would use dead-end links to boost their rankings in search results! You can now control how many legitimate links appear on your website versus those that frequently lead to 404 pages or even malware and consequently rank higher in Google’s search results.

After you’ve set your follow/nofollow tags, you can now decide to which rel attributes you want your links to apply. Type the desired text into the box below! If you don’t want any information about your website to seep into the target website, use the “noopener” attribute or “sponsored” for paid links. After that, you can set the title for your external links.
You can also add CSS classes here if you want these rules to apply to a specific group of external links. This step will drastically reduce the time spent modifying every link. These classes will be helpful when we discuss the “Link Rules” tab later.

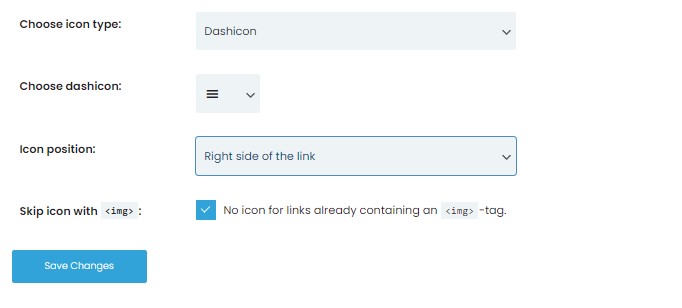
Finally, the only thing left to do in this section is to add an appropriate icon to your links. You can either import your images or use one of the icons provided by Freepik Icons, Dashicon or Font Awesome.
Once you’ve decided which icon to use, you can move it to the left or right side of the link. You can also skip links with the <img> tag already in the URL. All you need to do now is click “Save Changes,” and you’re done!
Exit Confirmation
You’ve probably seen exit confirmation popups before, as many websites use them to notify users that they’re about to leave the site. This is done to protect users from potentially dangerous websites and maybe even keep users on your website a little longer.
Under the “Exit Confirmation” tab, WP Links allows you to create your custom popup message. The first thing you’ll want to do is customize the popup background color and title. You can then change the font, background color, and title size.
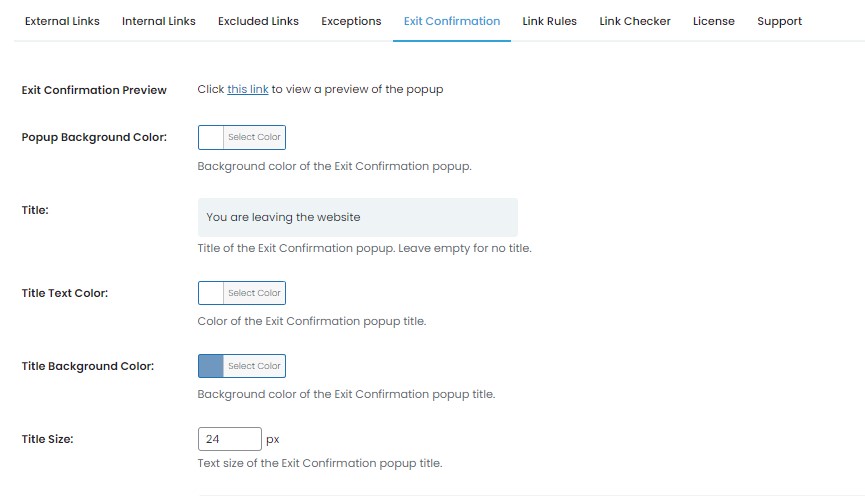
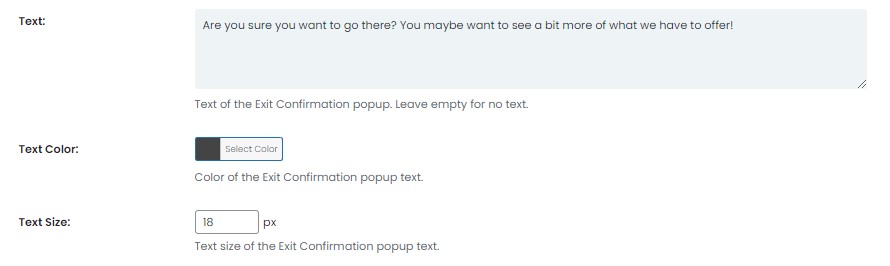
Now that your background and title are all set, you can add text to your popup message. You can keep it simple or get creative—it’s entirely up to you! Once you’ve figured out what you want your popup to say, you can also adjust its text size and color here.
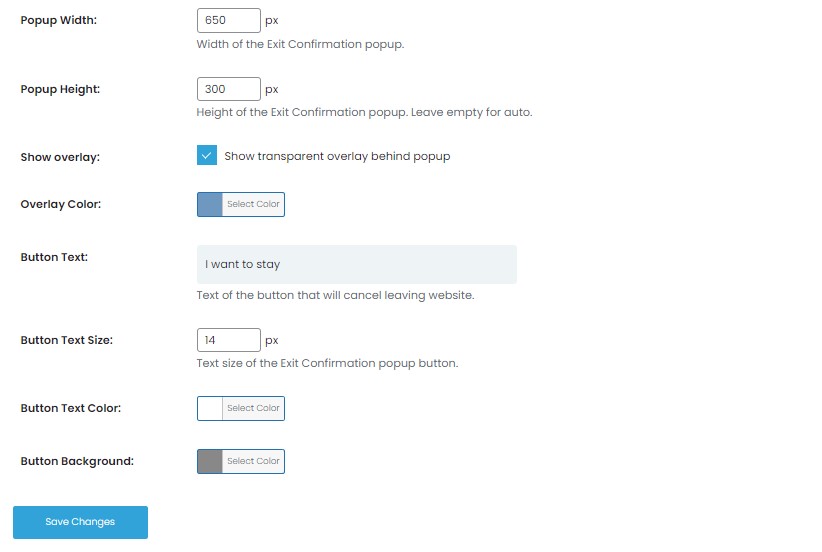
After you’ve finished the main “body” of the popup message, all remains are to tweak its appearance on the website. You can customize the popup’s height and width and add a transparent overlay and a colorful tint.
Finally, all that remains is for you to create and personalize your “I want to stay” button. You can enter any text you want for your button and adjust the size and color of the letters again. Pretty simple, right?
Link Rules
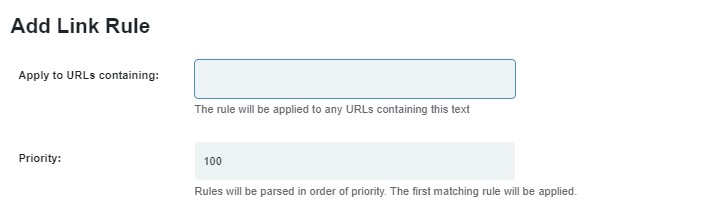
The “Link Rules” tab is our final stop for today. Remember how we said changes made in the “External Link” tab are applied to all external links without exception? This is your opportunity to make those exceptions!
Search for a specific keyword at the top of this link editor, and it will apply the rules to all links with the keyword in their URL. You can also assign a priority level to these rules, which is helpful if you have multiple rules for similar keywords.
Next up, you can decide where these specific external links will open, done in the same way as within the external links tab. You can also add these links to different rel attributes here, but this time, you can also add your custom rel attributes.
Once this step is complete, you get to decide whether or not you want these new rel values to overwrite the existing ones; if you wish only to set the values checked above, and so on.
Following that, you can set a specific title you would like to apply to these links. Additionally, if you would like to add some of the CSS classes you previously created to this particular set of rules, you can do that here too!
![]()
All that remains is to add your exit confirmation popup message and a fitting link icon, and voila—you’re done!